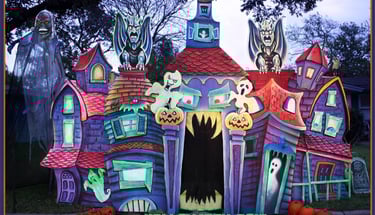
Austin Haunted House Halloween DIY
Our Austin Haunted House Halloween DIY project is your step-by-step guide to building a haunted house. Discover creative ideas, instructions, and inspiration from our experience to help you create your own unforgettable Halloween attraction
HAUNTED HOUSERS
If you’d like to know how Haunted Housers, Halloweeners, Halloweenies,
and Halloweenettes are made, read my blog ‘Halloween Person Potion’,
but make no mistake, these kind of people do exist, they are here, and you
may be one of them.
But Haunted Housers are a little different in that they all raise their voices
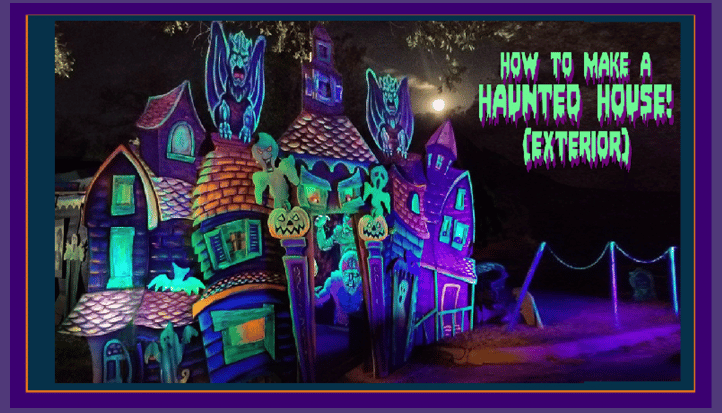
in one question, ‘How do I make a Haunted House’?
I’m here to answer that, and give you my experiences and advice after creating the longest running Haunted House in Austin, 25 years and still growing strong!
So go ahead, take the leap, tell your partner I said you had to do it. But my first advice to you is to accept that this will become a tradition if you didn't know it already. Start with a good plan, and long-term vision.
Factors to consider.
Do you own the home or are you renting?
If you own, that makes things easier, but even if you don’t, you can create something in a hallway, or other area on the property. Discuss it with the landlord, show him a detailed description of what you plan to do, what precautions you may take not to destroy the property.
Use/Re Use
Will it be reused every year, how much or how little will be reused? I certainly hope you plan on keeping and re-using most of the basics. If it’s going to be reused, portions of it have to be made of sturdier stuff, other portions, not so much..
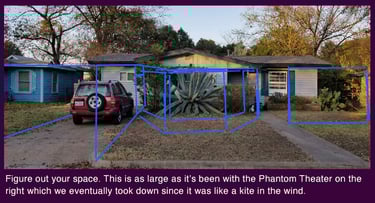
Display Space
Consider the space you want to use for the display, how much do you have? Are there creative uses of space you can incorporate into the design? Is there an opportunity for future growth? where is it best to have an entrance and exit? Where and how will kids get the candy? Will the space be separated from the home or will the home be part of the design?
Storage
You will need some storage space, and of course how much space depends on the size of the structure you want to create every year. But I’ll show you how to design for maximum use of space. My Haunted Houses are designed to fold up and use the smallest area of storage possible.
This is a short-list. You may come cross unforeseen challenges or those unique to your living situation. Have a plan, a simpler one is fine. No part of this has to be overwhelming except when the visitors come!
GUIDELINES
I found that setting some guidelines or rules at the beginning helped ground the idea of what I was doing, the how and why. I found that by having these rules, as well as the challenges of their limitations, opened me up to new ways of thinking and of creating, which in turn opened me up to new experiences I wouldn't have had if I relied on Home Depot to do my creating for me.
BE FRUGAL
The first rule guides the others. As an artist I did not have the thousands of dollars some people put into their decorations. So the first rule was re-use, which made sense to me as a frugal artist and environmentalist. I always try to use scrap material first and will fix, redo, and recreate in every way possible before considering throwing it away.
USE WHAT YOU HAVE
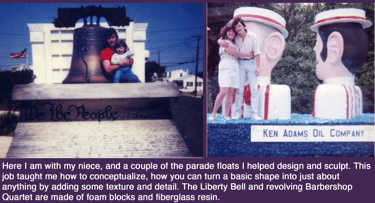
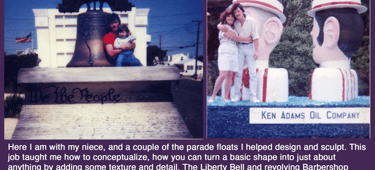
From my time creating float parades I learned that it’s all just basic shapes. If you can make a shape, you can make anything, and many things with interesting shapes are just lying around the house or yard. Trash cans, plastic bags, yard ornaments, look at everything around you and conceptualize- see it as a diamond in the rough. What can be borrowed or converted?
REPEAT THEME
Keep the same basic areas, and then add to them, and if it grows, add others. In keeping the same themes I could add to them annually and gradually rather than creating an expensive and time-consuming over-haul of structure and ideas every year.
These may not work for you, but they were invaluable for me.
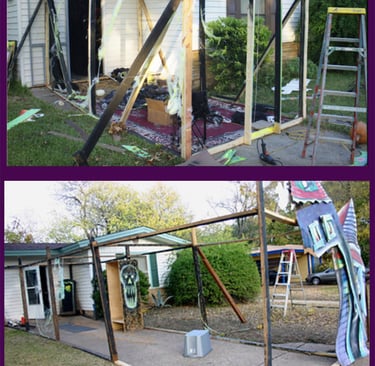
THE STRUCTURE
I know you probably already have theme ideas, but lets start with building the basic structure. From that, we can add freely. Some of you might be inexperienced with carpentry, but relax, only basic knowledge will be needed to create your own Haunted House, and one helper for portions of it.
I worked for a parade float making company in my youth. The warehouse was an Alice's Wonderland in giant structures, pyramids, castles, giant balls and squares, giant heads, etc. We’d convert the Aztec pyramid to a gingerbread house to a haunted house. It’s all just shapes, with added tinsel, texture, and other embellishments. A shape can be made into anything. And it's easy to create a shape
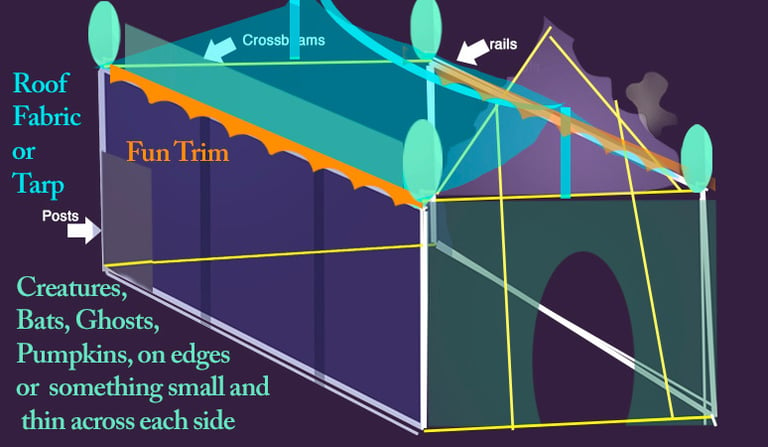
Our Haunted House shape will be a rectangle,
created by screwing 4 2x4's together. That’s all
it is and anyone can do it!
Materials
Screws, screw-gun, 12 2x4’s, 6 cheap panels
Ex. The Panels are standard size, 4x8 each
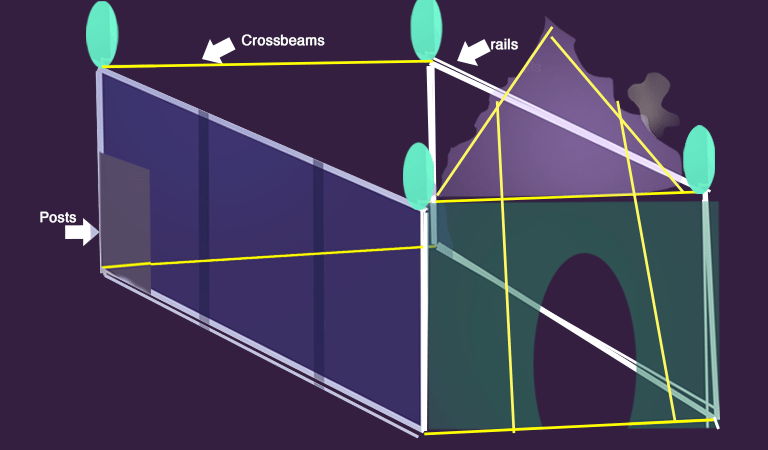
4 2x4’ x12’’ (Rails)
4 2x4x ? (Posts) Any size higher from 8ft.
4 2x4x8 (Crossbeams) or whatever width you
want to cover. Your driveway? Mine are 8-10 ft.
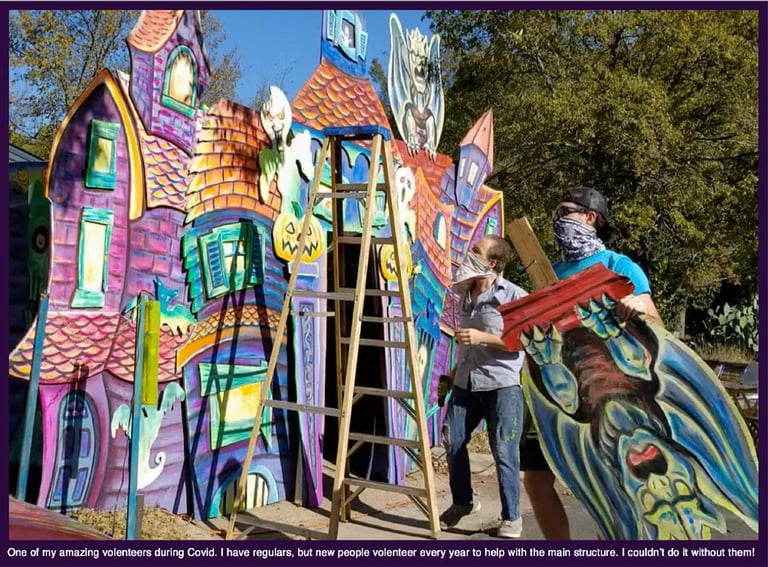
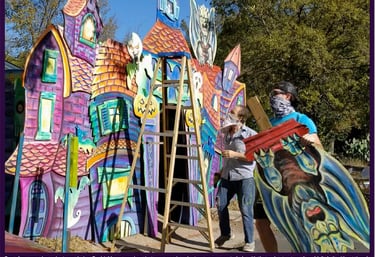
Crew
2 guys for initial setup. Then you can do the
Details yourself or with friends. But 2-4 hrs.,
And 2 people can put up the frame and the
heavier front pieces. I know I can do the
rest myself so I do those first and add the
sides myself if needed. I use volunteers so
i try to minimize their work-time, but
2-4 hrs gives you a large room to
create with, and a spooky outside
entrance designed to entice!
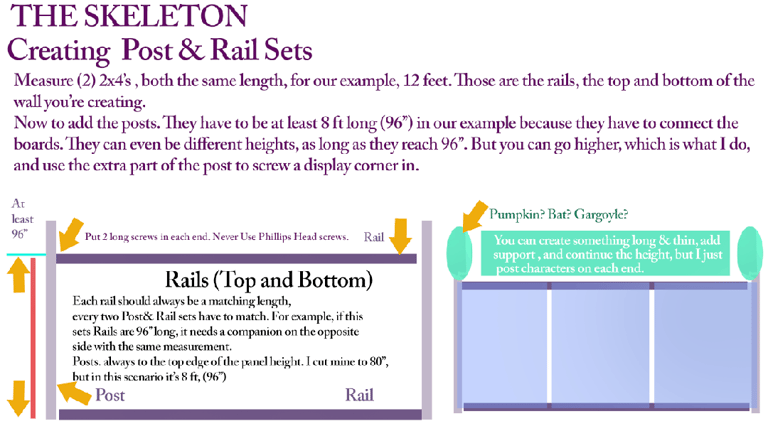
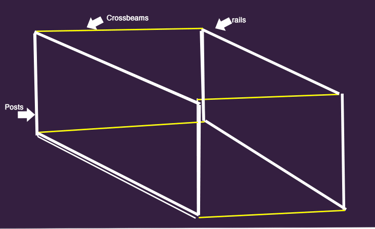
THE SKELETON
Create Two Post & Rail Sets
-We’re creating 2 rectangles,
with (4) 2x4’s each, and connect
them together. That will give us
(In our example), an 8ftx12 ft space
-We need to create at least
2 post and rail sets, which will
be the two sides, a left and a
right
(8) 2x4’s (4 each side)
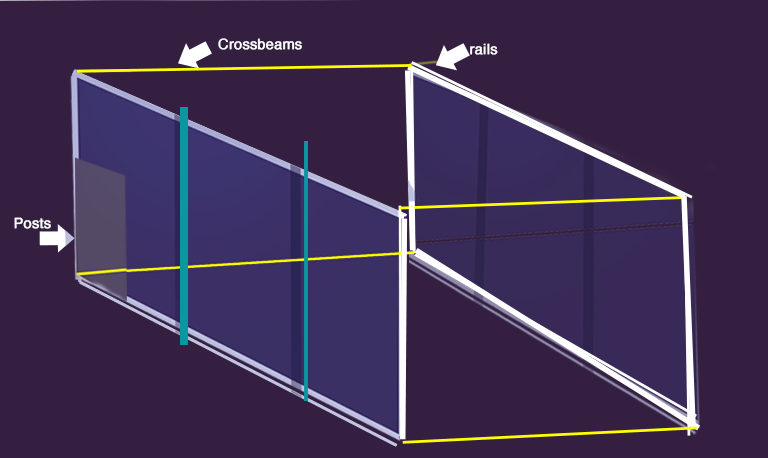
Attach your Post and Rail sets to Crossbeams.
I usually have a cross beam at the lower back and top, and one in the front top only.
I'll be adding more Posts&Rails like a set of trains, a lower cross beam isn't necessary for support if you're going to add on. That's one less 2x4 you need to store or a cause
for someone to trip, and attaching another rectangle will help support the whole thing, and we'll still be bracing it. But if the design is ending for you here, put a bottom
brace. if you'd like, but remember each person will have to step over it, or you can create a ramp.
Figure out your back exit area, and screw in the three panels on each side.
I overlap the panels and screw top and bottom across. When
it rains these things are going to try to bend and move until
dry and may dry curled if not secured.
Do this well the first time and they’ll last for decades. My
panels are from 25 years ago.
My panels are screwed across, top and bottom, and on the sides,
they're overlapped 1-2 inches. I'll screw those into each other.
This can be a little tricky as they are bending a bit as you try to
screw, but it's worth it to me to not have the extra 2x4 supports.
This gives me some screw heads to attach cobwebs.
Of course any sharp screws need to be covered.
For added security and ease, you can use 2 more 2x4’s like house
studs, at the edge of the panels. But remember, if you paint the
inside, those 2x4’s will be part of the design. and storage, and expense.
I minimize as much as I can, but support where I need to. Extend them
higher and you have two more supports on the sides for top props.
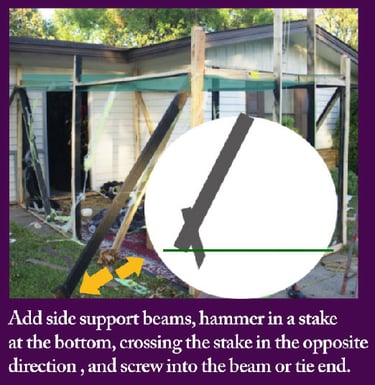
Don't forget to support your progress with a couple of 2x4's
on each side, staked to the ground like a circus tent.
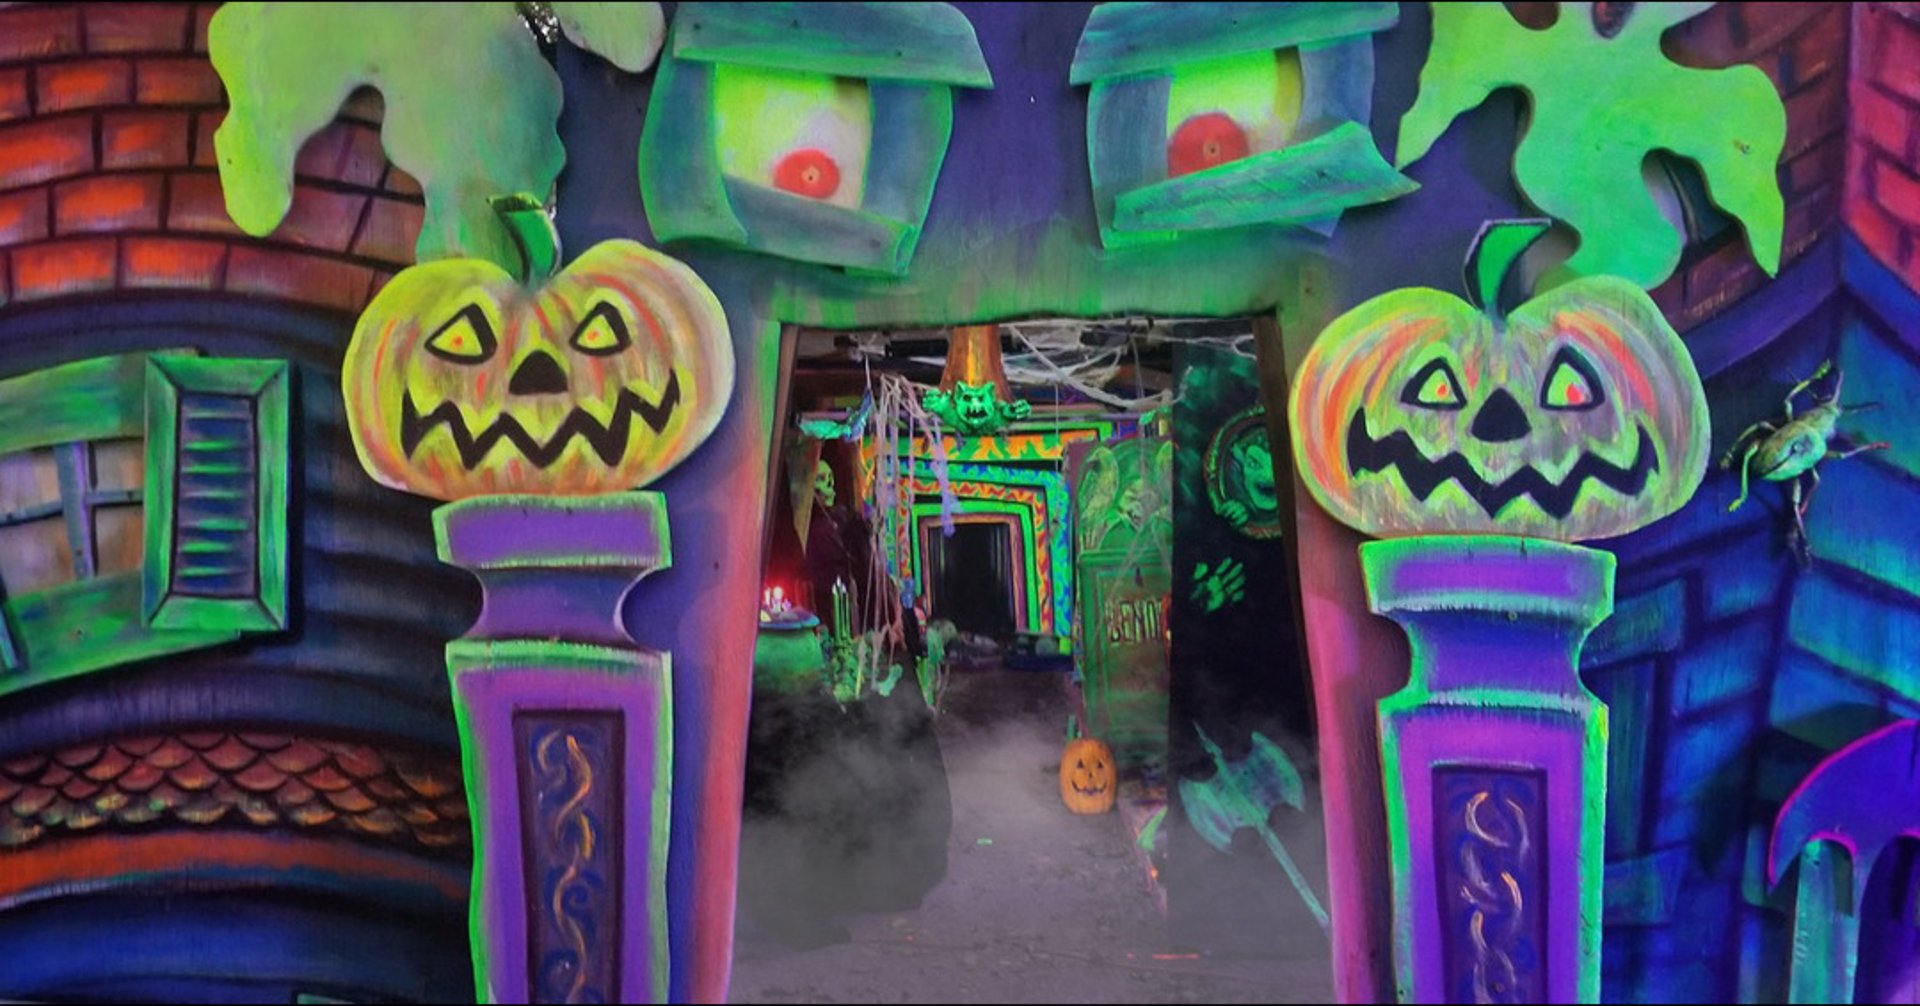
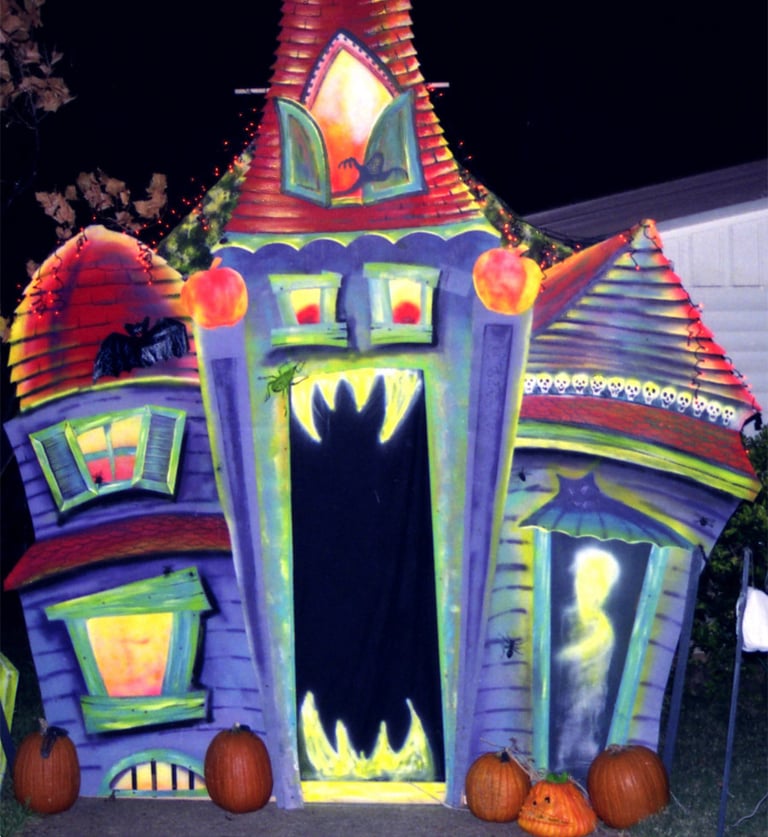
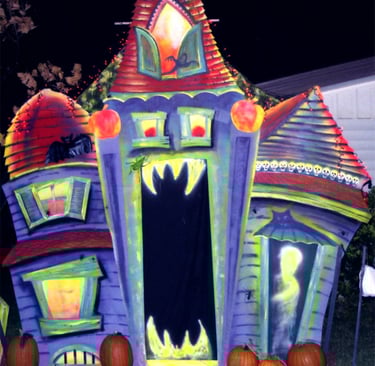
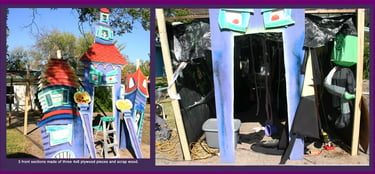
Now for those Front Pieces, and what will be your
grand entrance!


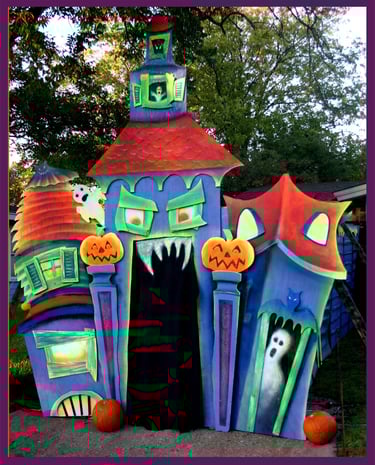


We've created our base structure, now we add the front pieces that you'll have sketched, cut and painted beforehand. This is going to be our main entrance, so put more work and thought into it. We want people to feel the sense of awe and wonder. Let's make a front section that will invite and thrill!
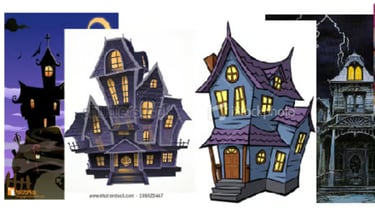
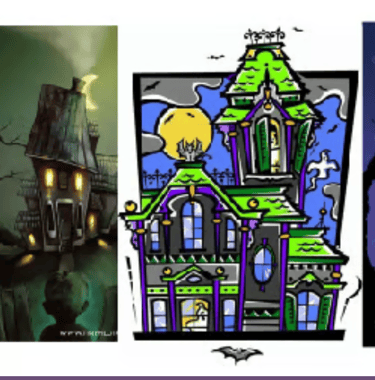
DESIGNING YOUR SKETCH
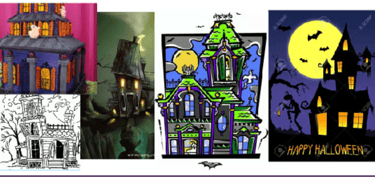
-Before cutting on wood, we sketch a design on paper. Research Haunted House images & colors. You'll find that most will be very detailed. Unless you're an expert, consider taking bits and pieces of what you like and starting simpler. You can look online for ideas, take screenshots, and make a folder of the most inspiring.
As an illustrator, I’m old school. I had my own files on all things horror reference, which I've collected for years. That helped me create something that I knew I could draw large, and cut with a jig-saw around its skewed edges.
-Intricate images can be painted, but intricate wood-cutting is another matter. Consider the turn radius of a jig-saw, and how difficult it may be, and it would be easy to damage. Keep the details to the inside, where you can paint them or layer them on.
-I kept my design essentially to whatever would fit on 3 pieces of 4x8 plywood and whatever add-ons I had in scrap wood and my imagination.
-Gain ideas from the reference, but remember, keep it simple if you're a beginner. But whatever you're able to sketch on a piece of paper, you can draw larger on a piece of wood, cut and paint. It's the over-whelming feeling of intimidation that stops many people from doing this, but it's all doable and easier than you think.
-Keep in mind, your front design must fit within the frame you just made. It's okay for sections to spill over, but at least a portion of all main front-pieces should be securely screwed into the frame, your
working width.
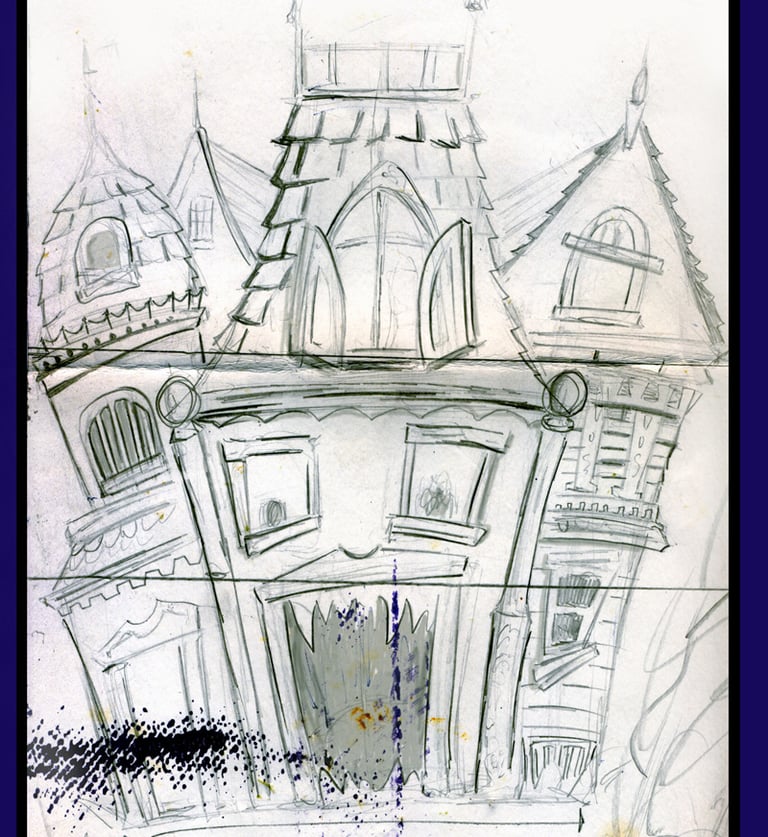
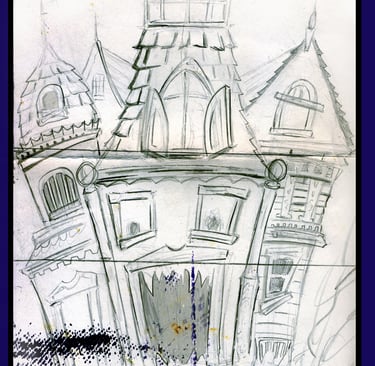
This was my original sketch for
the Haunted House I created in Austin.
Redraw your design onto plywood
Try drawing freehand onto your wood. If
you've kept it simple, you should be able
to do it, if not, use a projector. sections
will get the most weather, the most
interaction with people. They
need to be made of stronger stuff than
the cheap side panels. Initially I used thin
panels, but they would bend from rain,
and I had to replace them in 5 years,
though the side panels are low-use, and
have never needed replacing. So use
plywood of whatever decent, workable
thickness.
Do sand edges and caulk! You don’t want to
worry about kids getting splinters! And the
stronger you seal your edges, the longer it
will last!
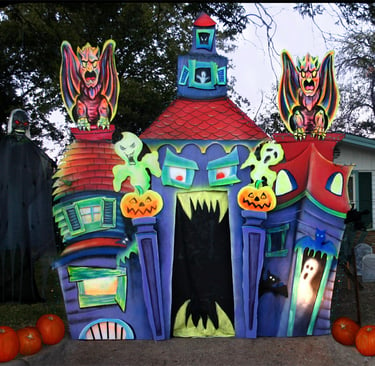
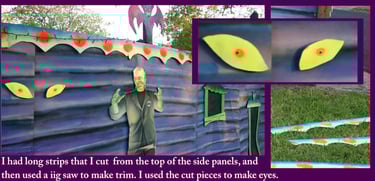
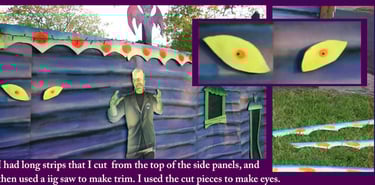
TRIM
Any thin strips of paneling left? You can do
what I did and add trim on each side.
This is a great way to add color and flare.
It takes very little work to cut them and
paint. Look what a difference it makes to the sides of mine.
I do little else for the sides themselves. The
left will ht close to the property edge,
the right will have a graveyard so for the
walls themselves, I just add fake doors and
windows
I had all these eye shaped pieces of small
wood from cutting the trim, so I created
a bunch of glowing eyes!
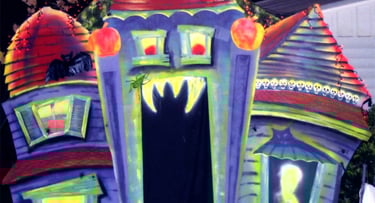
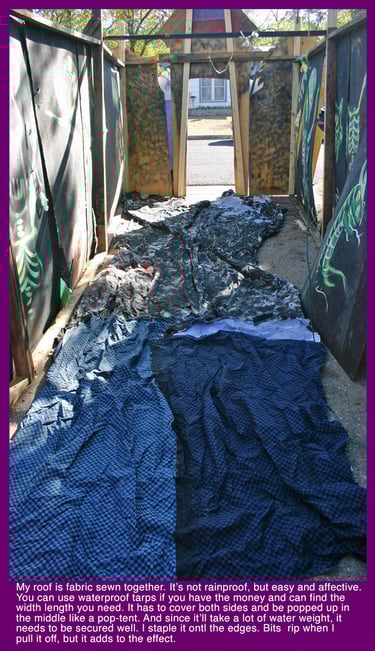
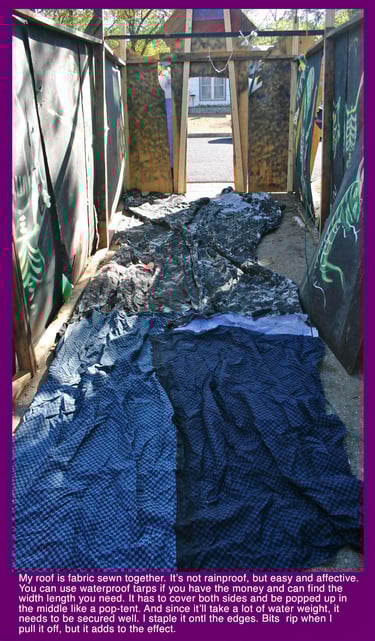
ROOF
For the roof, use tarp or sew old sheets
together. I also gave the sheets a bit of
a white-wash with black paint, to thicken
it and add wonderful texture that hits of the
black-lights. It's going to rain, so if you don't
have a middle line, like a tent, it'll build up.
I run a line from the front center to the
back as illustrated.
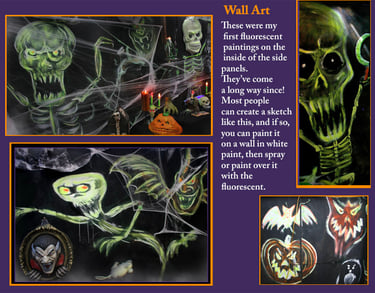
PANELS
Paint the insides of the panels black, and
then create a design with white paint. It
needs to be white to make the colors pop!
When you've finished, go over that design
with Fluorescent Paints, either by spray
or fluid acrylics. *Spray cans can be cheap
and easy for coverage, but they'll be less
intense under a black-light. Get a can and
a jar and see which works best for you.
And once again, a reminder to secure
your work against wind with support
beams on the sides.
There ya have it, the start of a pretty darned
cool neighborhood Haunted House! What
you fill it with depends on many factors but
if you're a 'Haunted Houser', you may already
have some ideas. Good Luck!
If you'd like more suggestions, read my blog:
Skyview Haunted House: The Props!
Or to reinforce what you've learned, continue
reading about how we built an addition wing
and a Phantom Movie Theater!
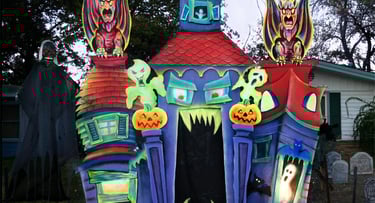
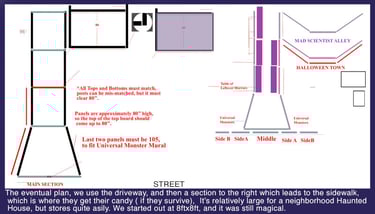
WELCOME TO OZ!
The Making The Main Front Section


Challenges.Changes
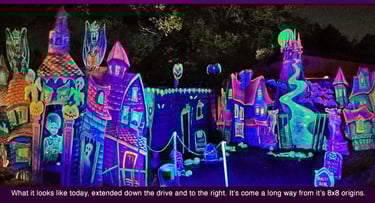
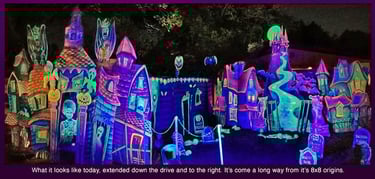
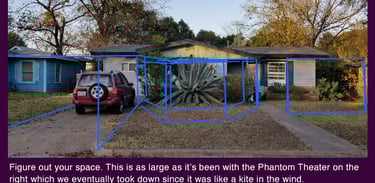
The year of Covid we extended it through the yard to the right, creating a more open space. In the front
center was Halloween Town, behind that, in the space created, The Mad Scientists Alley was born! Then
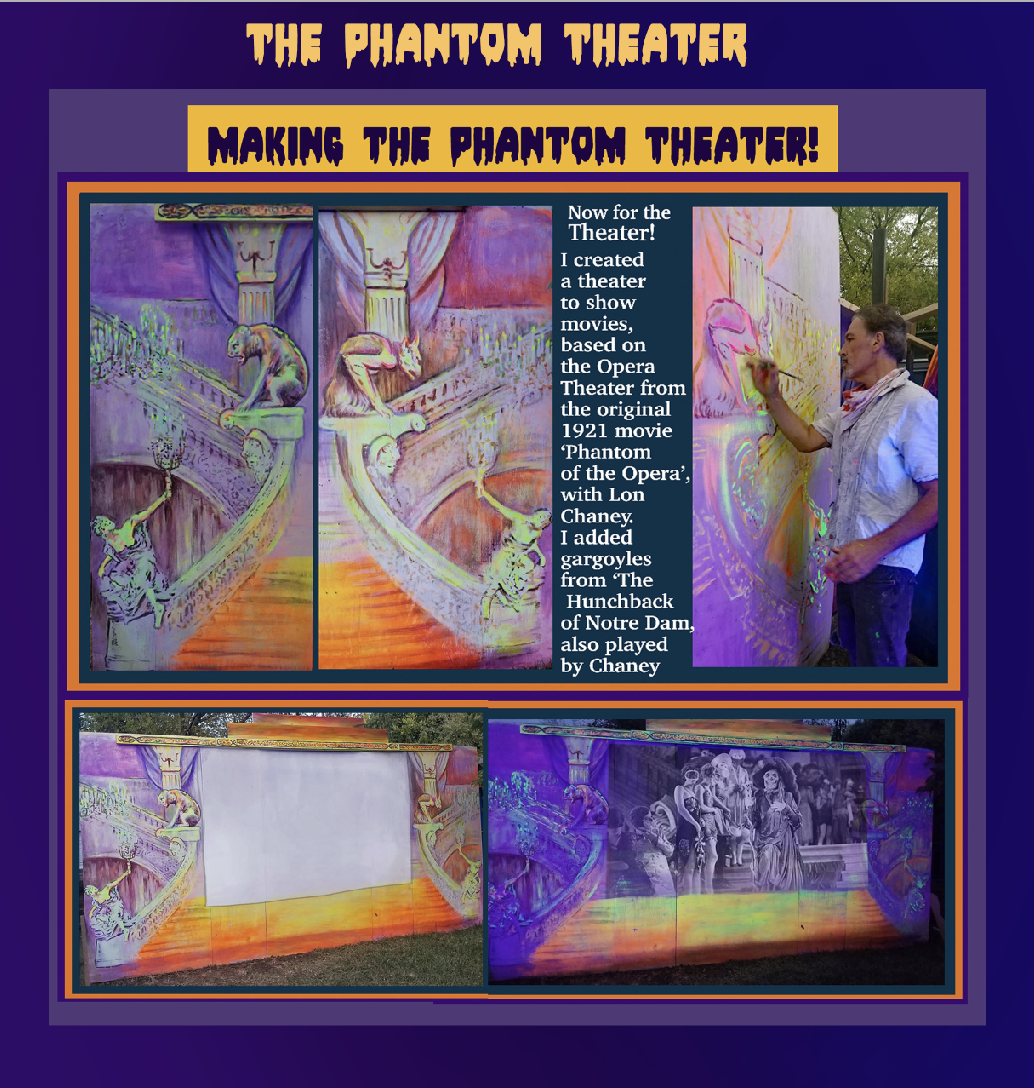
I created a movie theater on the far side of the center walk, the Phantom Theater! Did this help you
visualize your own project? Just remember, you're a Halloween person, you've got this!


We'll be adding a section on how to store your Haunted House, so check back with us!
Subscribe for news, discounts, events & more!
© 2025. All rights reserved.
Ask us about our Art Layaway Plan, divided into 3 payments, and you can take up to a year to pay.
We'll keep it stored and ready for you!